

How to Set Up Email-to-Case in Salesforce
Email-to-Case is a Salesforce feature that automatically converts customer emails into support cases. It helps streamline customer service by capturing email content and attachments, assigning cases to the right agents, and keeping all communication in one place for easy tracking and resolution.
Let’s walk through the step-by-step process to set up Email-to-Case in Salesforce.
1. Enable Email-to-Case
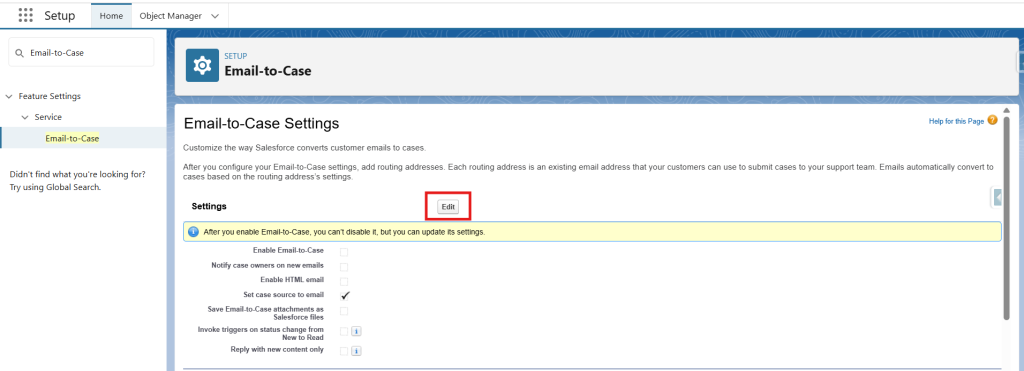
The first step is to enable email-to-case for that go to Setup in Salesforce.
- In the Quick Find box, type Email-to-Case, and select it.
- Then, click on Edit on Email-to-Case Settings
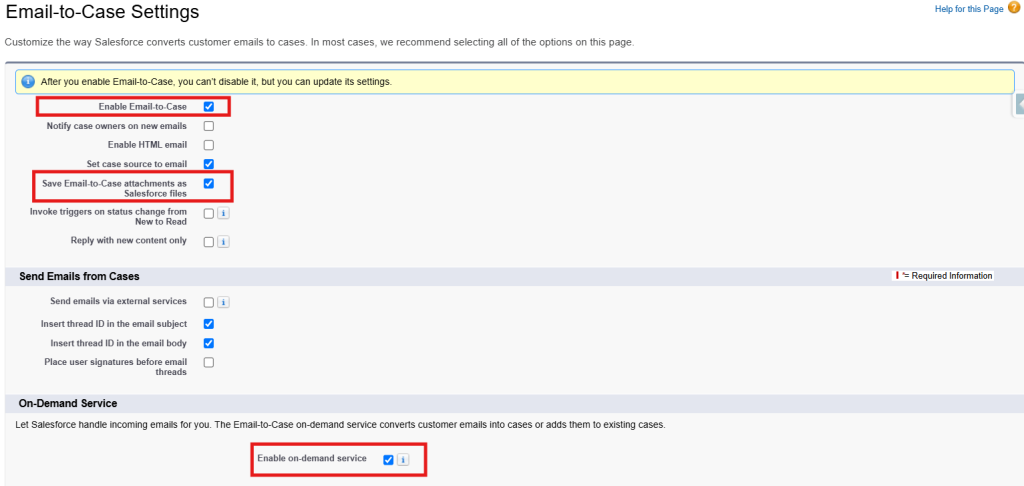
- Check the Enable Email-to-Case and Enable on-demand service and click on Save.
- Enable Save Email-to-Case attachments as Salesforce files if you want email attachments on the case.
2. Configure Routing Addresses
After enabling email-to-case, the next step is to add Routing Addresses
- Click New to create a routing address.
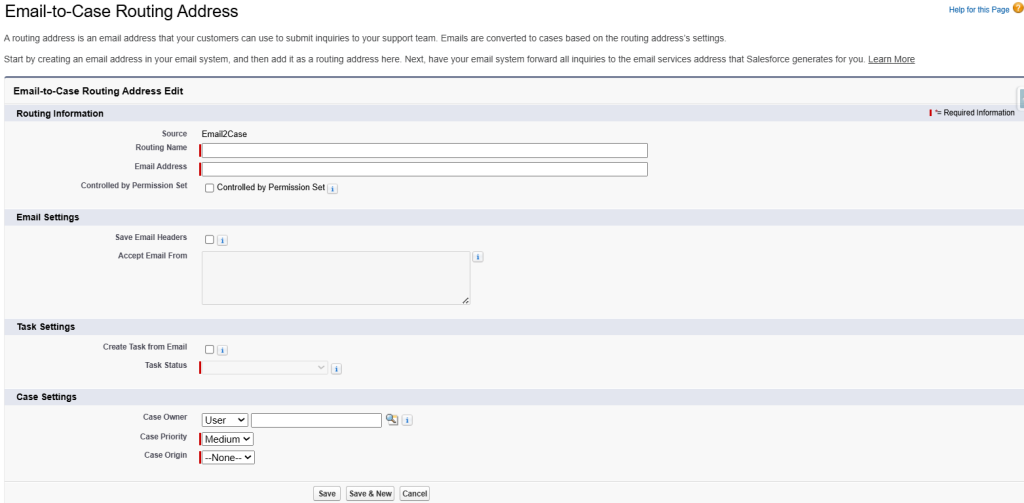
- Fill in the fields such as Routing Name, Email Address, and Case Owner, Priority, and Origin.
- Click on Save button, Salesforce will then send a verification email.
- Open your inbox and click the verification link.
- Adding routing address will also create Email Services Address for you to forward emails on it.
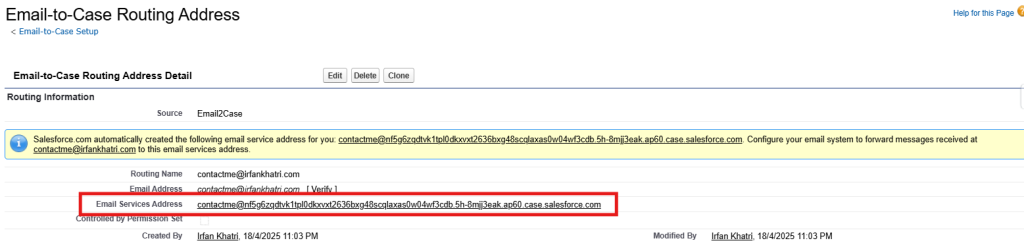
- Add this Email Services Address in the forwarding address of your email.
Note: If you are adding forwarder in google, yahoo etc, it will send confirmation email first so do not forgot to click on it.
3. Test the Setup
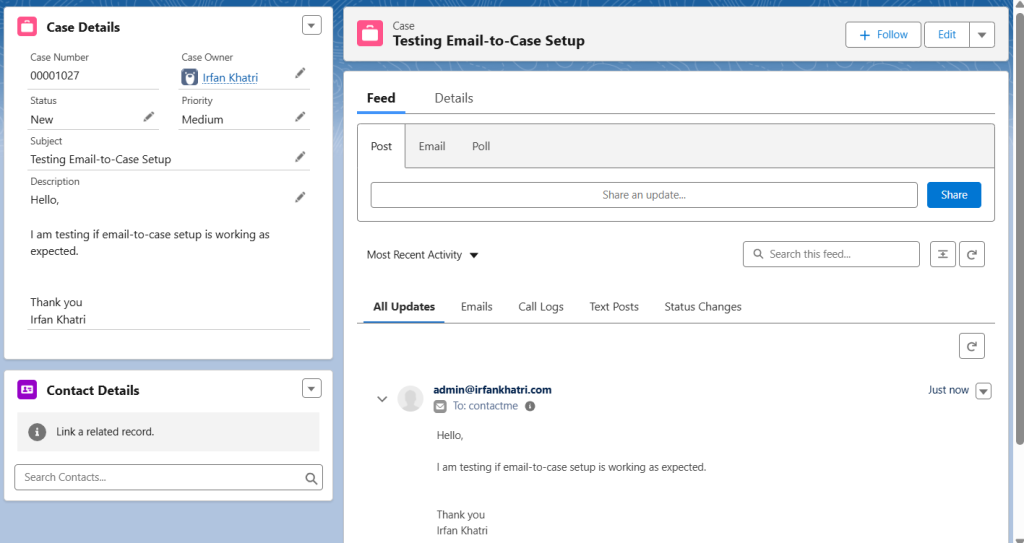
Once everything is configured, send a test email to the routing address. Check Salesforce to confirm the case is created correctly.
Ensure that all related fields are populated as expected. If something isn’t working, review your email service settings and Apex code if used.
Associate Contact To Case
- The Email-to-Case logic queries all the Email fields on the Contact object, including Standard and Custom Email fields.
- Upon finding a match in any of the email address fields, Email-to-Case assigns the Contact to the new Case.
- If two or more Contacts have the same email address, Email-to-Case leaves the ‘Contact’ and ‘Account’ fields blank.
- If no matching Contacts are found, Email-to-Case leaves the ‘Contact’ and ‘Account’ fields blank, but populates the fields ‘Web Email’ and ‘Web Name.’
Email-to-Case Limitations
- Daily Email Processing Limit: Salesforce can process up to 1,000 emails per user license per day, with a maximum of 1,000,000 emails/day per org across all email services.
- Inbound Email Size Limit: Maximum size allowed (including headers, message content, and attachments) is under 25 MB.
- Outbound Email Size Limit: Outbound emails can be up to 384 KB, not including headers, attachments, or inline images.
- Maximum Email Length: The maximum email length before an inbound or outbound email is truncated is 32,000 characters for email headers and 131,072 characters for the email body.
Summary
Setting up Email-to-Case in Salesforce transforms your customer support process by automating case creation from incoming emails. With the right configuration—routing addresses, assignment rules, and auto-responses—you can streamline workflows, reduce response times, and enhance customer satisfaction. While the initial setup requires attention to detail, the long-term benefits for your support team and customers make it well worth the effort. Test thoroughly, train your users, and you’ll be ready to deliver faster, smarter service.
If you have any questions or need help setting up Email-to-Case, feel free to leave a comment below we’re here to help!