


How to Create Case Assignment Rules in Salesforce
In Salesforce, Case Assignment Rules help streamline customer support workflows by automatically assigning cases to the appropriate users or queues based on specific criteria. This ensures that incoming support issues are routed efficiently, improving response times and overall customer satisfaction.
In this article, we’ll walk through the steps to create and manage Case Assignment Rules in Salesforce.
What Are Case Assignment Rules?
Case Assignment Rules in Salesforce determine how cases are assigned to agents or queues based on predefined criteria. These rules are especially useful in customer support scenarios where cases are submitted via web, email, or other channels.
Note: You can only have one active case assignment rule at a time, but that rule can contain multiple rule entries.
Steps to Create a Case Assignment Rule
Let’s break down how to create a case assignment rule in Salesforce:
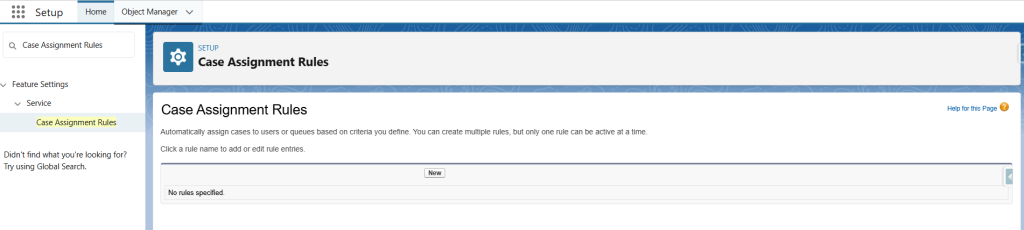
1. Navigate to Setup
First, go to Setup in Salesforce. Then, in the Quick Find box, type “Case Assignment Rules.” Click on the link to open the rules page.
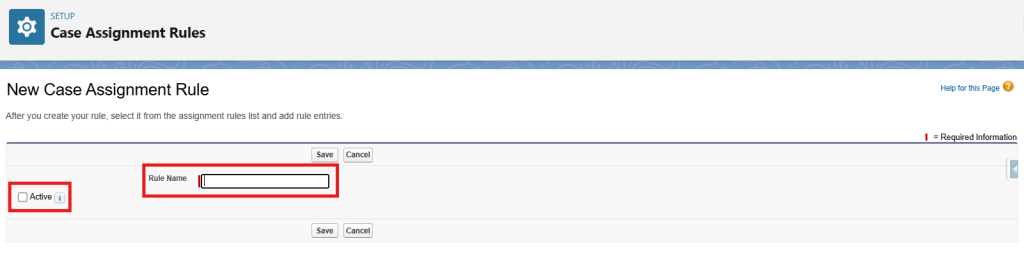
2. Create a New Rule
Click the New button. Give your rule a name and set it as active if you want it to take effect immediately.
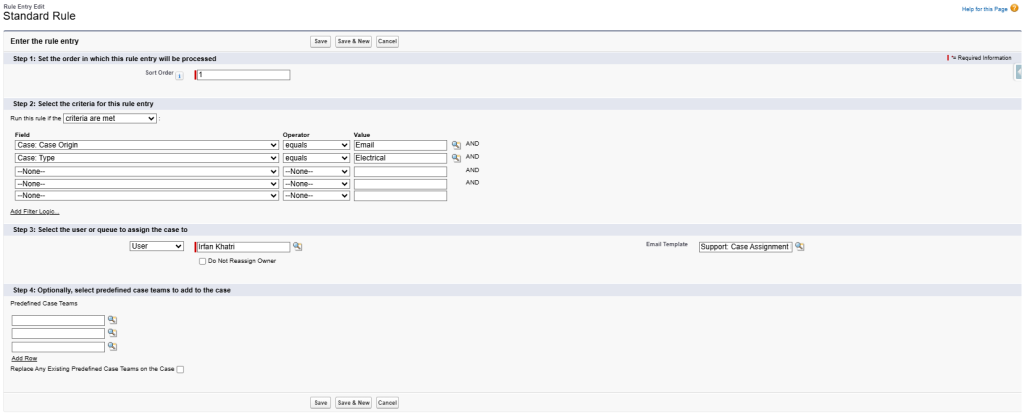
3. Add Rule Entries
Next, click on the rule name. Then, click New under Rule Entries. Each entry defines criteria that Salesforce will evaluate.
You can use fields like Case Origin, Type, Priority, or custom fields. Decide whether the case goes to a user or a queue. Also, choose if an email should be sent to notify the assignee.
For example, assign all “Email” origin and “Electrical” type cases to the “Irfan Khatri” user. And all “Web” origin type cases to the “Web Support” queue.
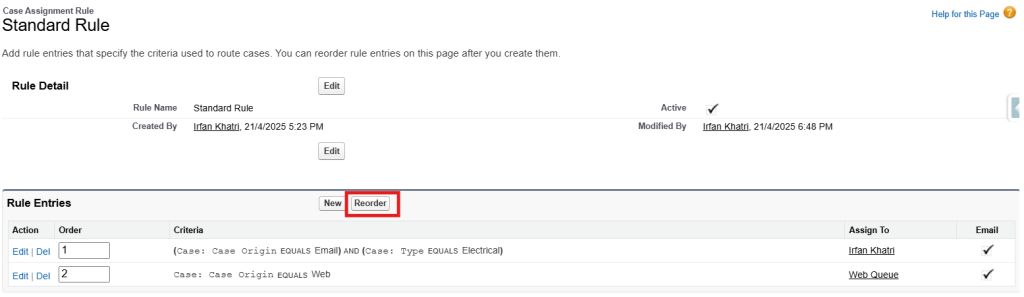
4. Reorder Rule Entries
Salesforce evaluates rule entries from top to bottom. If one entry matches, the system applies it and skips the rest. Therefore, order matters.
Troubleshooting Steps
Even when set up correctly, assignment rules may not behave as expected. Here’s how to troubleshoot common issues:
1. Check If the Rule Is Active
Ensure the rule is marked as Active. Inactive rules will not trigger, no matter the setup.
2. Verify Rule Entry Criteria
Sometimes the rule logic is too strict or does not match actual data. Double-check the field values being evaluated.
3. Confirm Field Values Exist
If required fields such as Case Origin are empty, entries may not match. Confirm all needed data is being populated.
4. Only One Rule Active
Salesforce supports only one active Case Assignment Rule at a time. Make sure you haven’t left an old rule active.
5. Assign Using Active Rules Checkbox
When manually creating a case, check the “Assign using active assignment rule” box. If it’s unchecked, the rule won’t run.
6. Check Object-Level and Field-Level Security
The assignment rule depends on access to the fields used in rule criteria. If a field isn’t visible to the automation case user, the condition may silently fail.
7. Check the Automated Case User Setting
Go to Setup > Support Settings, and look for Automated Case User. This user is used for actions like Email-to-Case and assignment rule executions. Ensure this user:
- Is active
- Has the proper permissions
- Can access relevant queues and fields
8. Test Criteria with SOQL Queries
Use SOQL queries in the Developer Console to simulate the criteria and verify that the expected cases are returned.
Summary
Case Assignment Rules in Salesforce offer a powerful way to streamline case management by automatically routing cases to the right support reps or teams. By setting them up correctly, you ensure faster resolution times and better customer satisfaction. Whether you’re handling web inquiries, emails, or manually entered cases, automated assignments can make your support process much more efficient.